Inspired by a design in Woodsmith magazine, this drop front desk will fit nicely into Linda’s office, which does double duty as our guest room. With the desk closed, the Murphy bed will have plenty of room to open without having to rearrange the furniture, as we have to do now. This desk will have three drawers and two pullouts behind doors. We’re still thinking about the cubbies that will be separate inserts behind the drop front door.

Every cabinetry job starts with a trip to Chelsea Lumber for birch plywood

The plywood rolls into the shop in the same orientation from the truck

Each sheet slides onto saw horses to be broken down in the long direction with my track saw

Sheet goods ready for final width sizing on the table saw

The Marietta Wood Works version of the desk design done in SketchUp and LayOut

Laying out cable access in the upper and lower carcass backs

One inch radii cut with a two inch Forstner bit

Plunge cutting the straight portion of the openings by raising the table saw blade


Cutting rabbets and grooves in carcass members with a stacked dado blade and sacrificial fence

Lower carcass first dry fit

Shop view

Sanding interior surfaces to 150 grit before assembly

Using my track saw to pad cut the sixty-nine degree angle on the upper carcass sides

Pad sawing makes both sides identical

Using a dial indicator to make 0.010″ adjustments to the rip fence for cutting a twenty-one degree bevel on the upper carcass top panel to match the sides

Upper carcass first dry fit

Upper and lower carcasses assembled and stacked in eventual final configuration
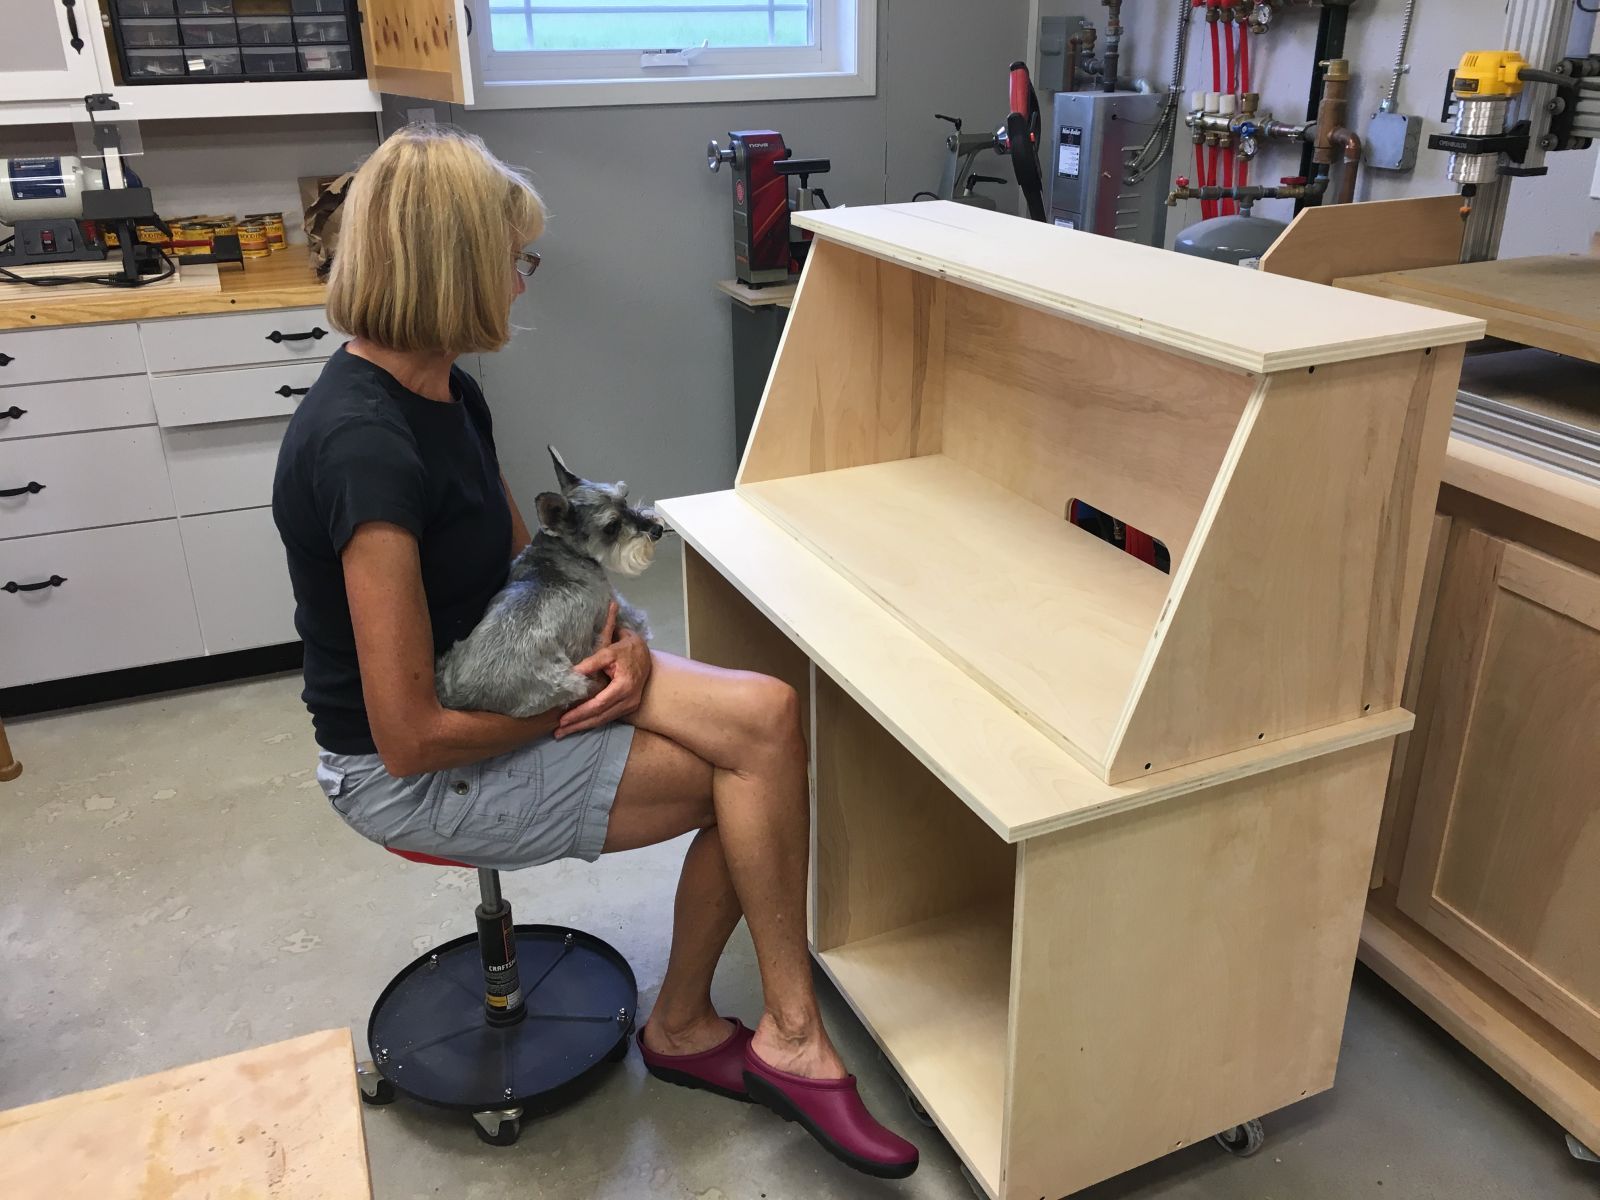

Linda and Murphy getting a first look at the new desk

Maple sides cut for base assembly
 dry fit")
Base first (upside down) dry fit

Laying out cutouts in base sides and front

Ready for the bandsaw

Bandsawing 2 1/2″ radii, leaving the line for the drum sander
 dry fit")
Base second (upside down) dry fit

Oscillating drum sander makes quick work of cleaning up band sawn edges

Oscillating drum sander overview

Cutting coves with a 1/2″ radius on the router table

Router table overview
 dry fit and clamping trial")
Base third (upside down) dry fit and clamping trial

Base detail showing corner blocks

Using my DIY self-centering drill press vise to drill holes in base cleats

Using the painter’s-tape mitered corner folding method for base glue up

The painter’s tape acts as a hinge, maintaining joint alignment and preventing glue squeeze out

The old angle drive adapter comes in handy every so often
 with blocking details")
Base bottom (never to be seen again) with blocking details

Base, right side up

Linda’s custom design was adapted from this design in Woodsmith Magazine

Lower case temporarily set on base

Front view

Base, lower and upper cases, to get a feel for the volume of the finished desk

Adding mitered strips to upper and lower panels, to be bullnosed in place on the router table

Quarter inch thick edging strips cut and ready to attach

Edging strips for lower case

Edging strips attached to upper case with Titebond III glue and 3/4 inch, 22 gauge pin nails

Simulating panel construction with thin sawn maple from Hardwood Solutions, Inc.

Completed simulated panels on lower case

Lower case with bullnosed lower panel

Hardware for drop front and doors, including magnetic catches

Completed simulated panel on upper case

Test stack of major subassemblies

End view of test stack

Machining stock for drop front and doors

Stock is machined to ~80% finished dimensions and allowed to sit over night to allow internal stresses to relieve before machining to final finished dimensions

Blum Tandem Blumotion undermount drawer slides

Milling grooves in door frame components

Tenon shoulder cuts on the table saw

Tenon cheek cuts with the tenoning jig

Before cheek cuts

After cheek cuts

Drop front assembly, using 1/2″ plywood for the panel so the writing surface is even with the frame

Assembling one of the lower doors

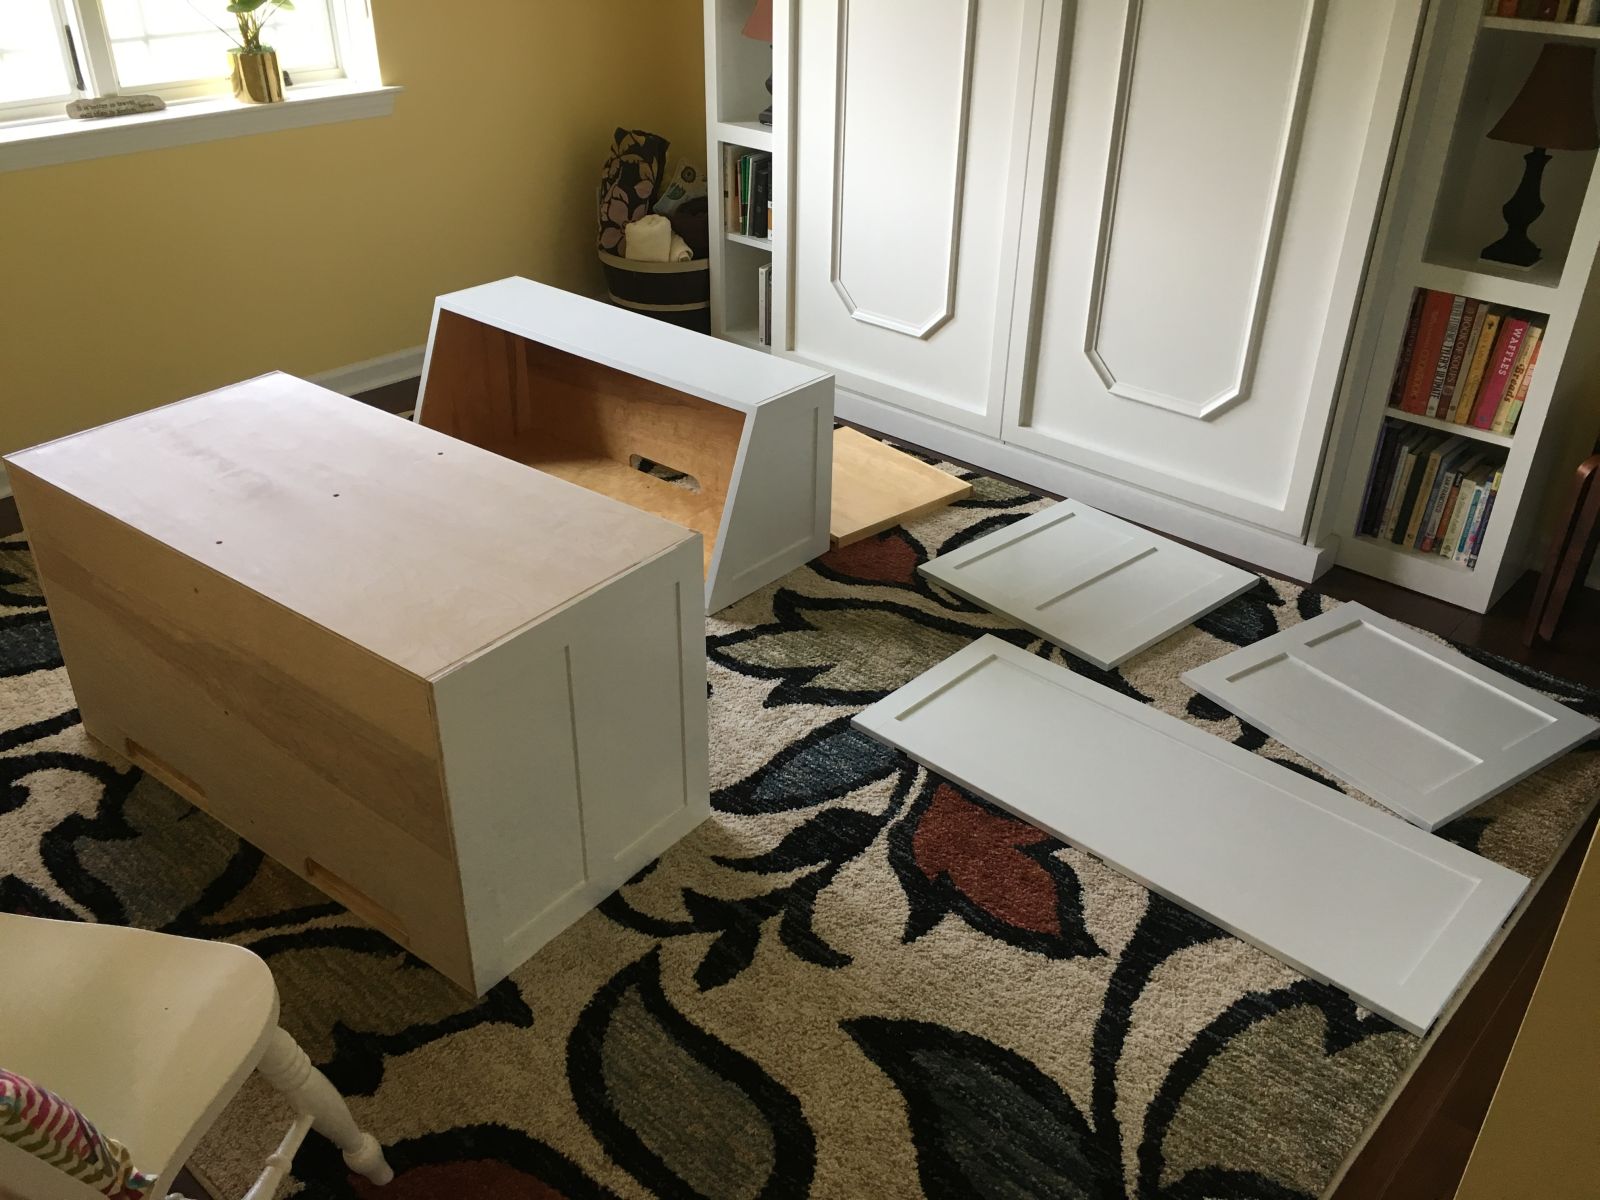
Drop front and doors set in place

Making a jig for the sewing machine hinge mortises

Refining the jig cutout with the oscillating spindle sander

A good fit on the hinge outline

Layout tools and the 5/8″ diameter top bearing router bit

Hinge instructions directed a 1/32″ gap between components, but a 1/16″ gap would have been better

Removable inserts allow for using the same jig to cut clearance for the hinge knuckles

A technique from the CNC router, painter’s tape on jig and components with a few drops of CA glue hold the jig firmly in place for routing the hinge mortises

Ready to rout the first of three sewing machine hinge mortises

Drop front with all three sewing machine hinges installed

Setting up to install the no-mortise door hinges

A quick jig with holes drilled to enable locating the mounting holes on the case side of the hinges

Lower doors successfully mounted with no-mortise hinges

A belt-and-suspenders approach dictated the addition of drop front door stays for additional support

Scrap plywood and a piece of piano hinge simulated the drop front motion, to allow test positioning of the drop front supports

Once the final mounting locations were established with the test setup, those locations were transferred to the drop front and upper case

The drop front supports bridge the drop front joints that would have taken all of the stress when the drop front was in use

Drop front supports and sewing machine hinges, all from Rockler, installed, will be removed prior to finishing

Marking a crescent finger pull on three drawer fronts

Kreg pocket screws for 1/2″ material reinforce the drawer assemblies

These new slip-on assembly clamps for 1/2″ material made drawer glue up and assembly very efficient

New slip-on assembly clamps from Rockler

A finished drawer ready for final sanding

Three drawers ready for finishing and installation

Assembling the pull-out trays

Desk components ready for finishing with spar urethane and bright white urethane trim paint


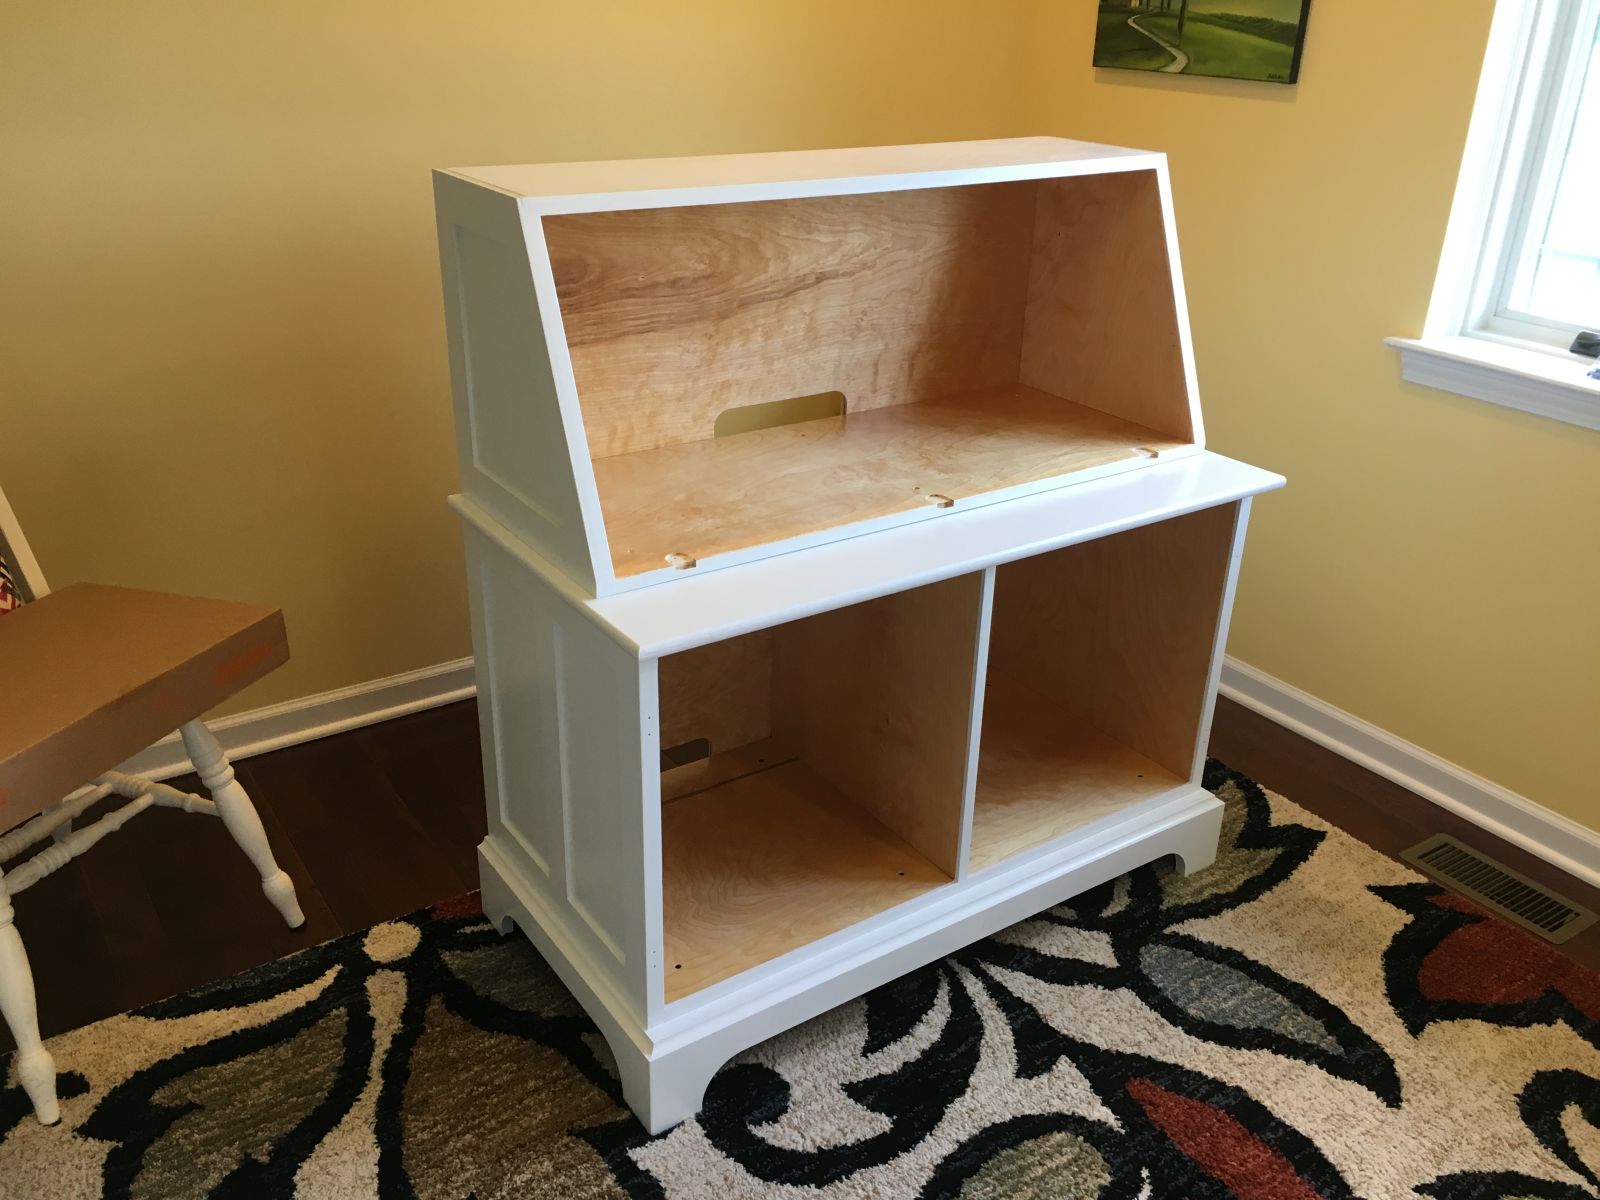
Upper cabinet with semi-gloss urethane on the interior and bright white urethane trim paint on the exterior

Lower cabinet in the finishing process

Lots of individual components finished and ready for final assembly

Finishing materials used on this desk

Desk base positioned in its new home location in Linda’s office

Base, upper and lower cabinets assembled and ready for more components

Using pre-cut spacers to locate drawer slides for installation

Drawers and pullouts fully installed in the lower cabinet

Five sets of Blum TandemMotion soft close drawer slides provide smooth openings and closings

Finished desk, closed

Finished desk, lower cabinet doors open

Finished desk, slant front open

Another happy customer of Marietta Wood Works!
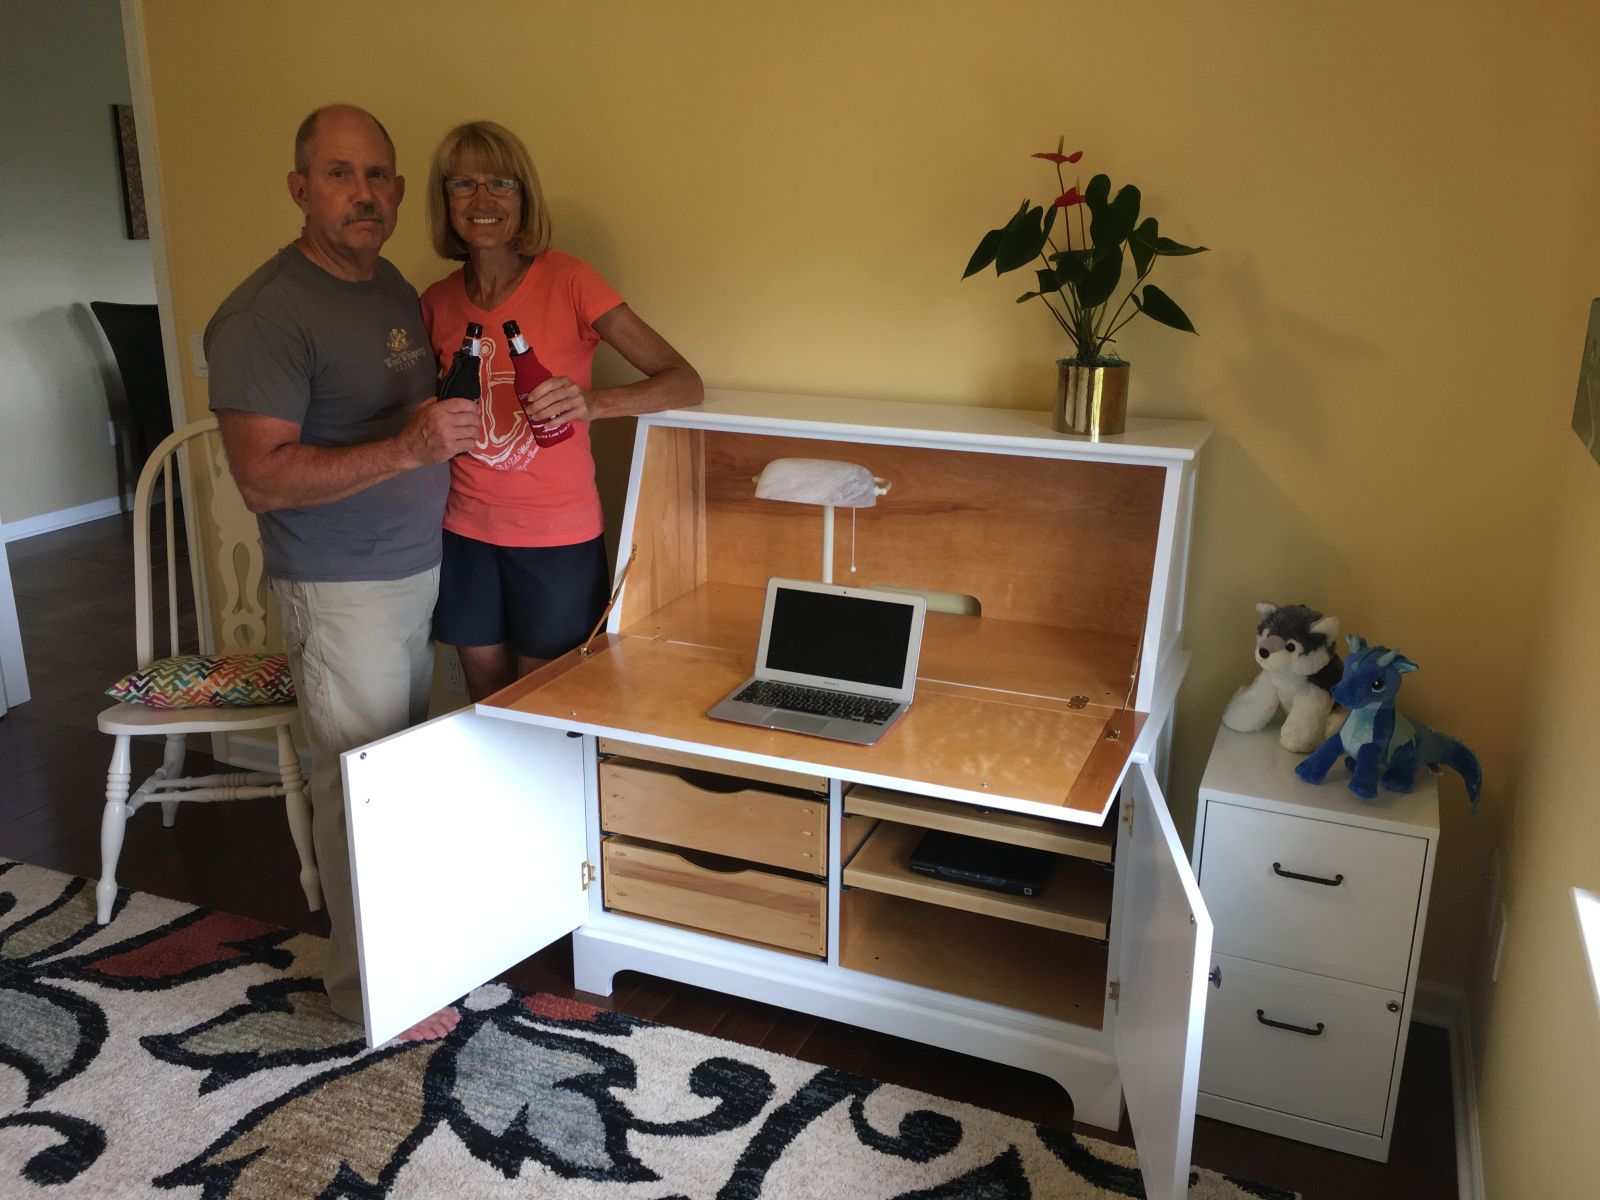
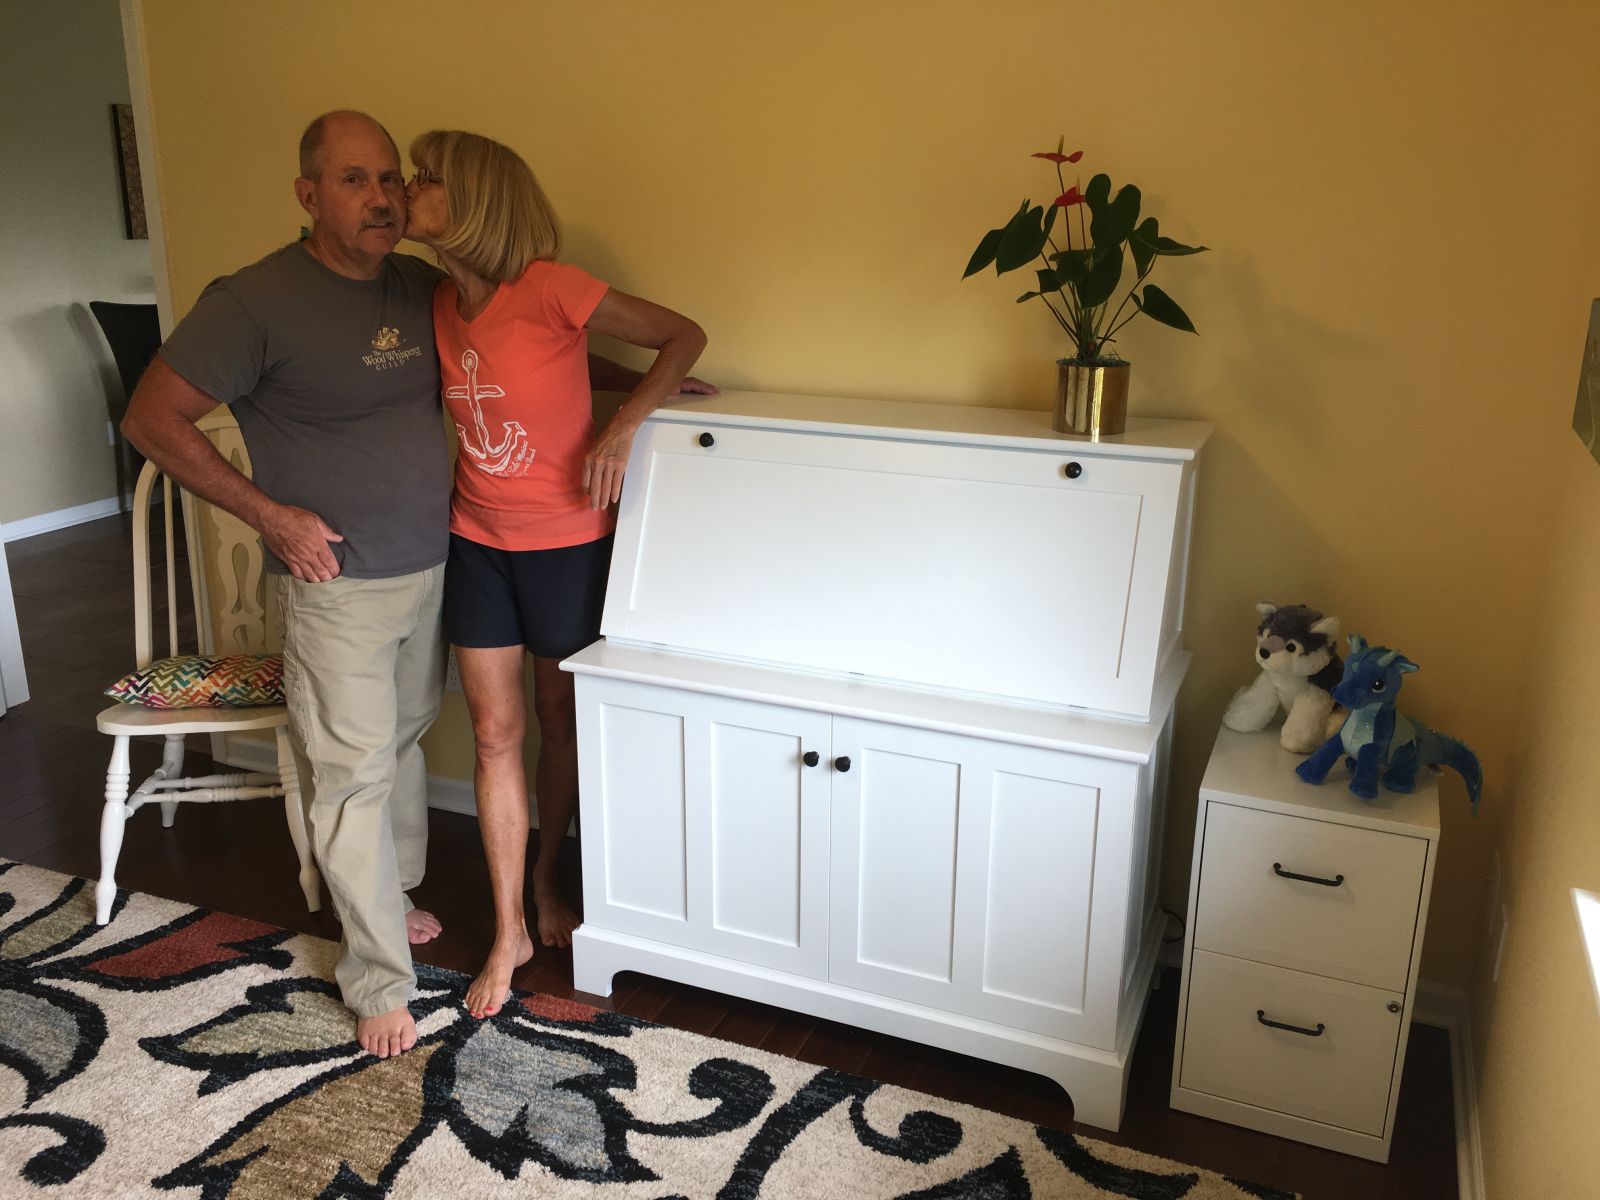

Celebrating a successful joint project to be enjoyed for years to come